Using a UV lamp is essential for successful gel nails. But what are the steps to use a UV nail lamp? Do you have any idea? Keep reading, Maryton nail supply will give you answers.
Here are the recommended steps for an impeccable manicure/pedicure:
Step 1: prepare your nails
Before using the lamp itself, the nails must be prepared. Starting with thorough cleaning and careful drying. With the cuticles pushed back, the nails must be filed to facilitate the application of the products, then wiped dry.
Step 2: use a primer
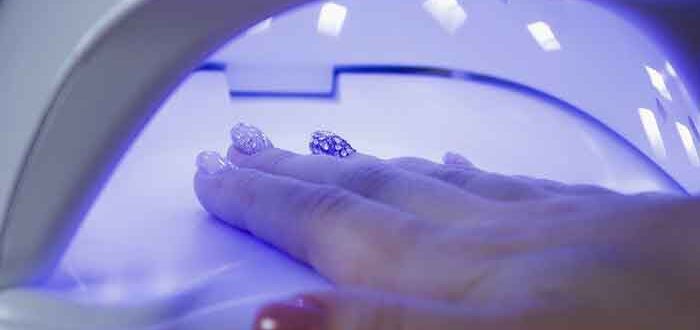
Then, an adhesion primer must be applied. At the same time, the UV nail lamp can be connected to the mains. Once the primer has dried, a first coat of base coat can be applied and cured, before starting again with a second coat.
Step 3: applying gel or semi-permanent varnish in layers
It is time to move on to applying colored gel varnish or semi-permanent varnish. The rhythm remains the same: first layer – catalysis – second layer – drying with UV nail lamp. Eventually, nail art can further embellish and decorate the nails.
Step 4: top coat and finishes
A finishing gel, or top coat, will fix the varnish and ensure a shiny finish. It also requires a UV nail lamp.
Hoping that this article has pleased you and will give you ideas! In addition, I recommend investing in some professional manicure kits to care for your nails.
Read also: How To Improve And Accelerate The Speed Of Nail Growth?
 Application of semi-permanent varnish; How to do ? The application of semi-permanent varnish has become a real phenomenon in the world of manicure for several years. You will find in this article all the tips to have a quality varnish. The advantage of applying semi-permanent varnish is the long wear of the varnish. Indeed, it lasts between two to three weeks without losing its shine. Then, the nail has…
 How to make a semi-permanent manicure at home? What a joy to have a varnish that lasts well on your nails! That it does not flake off after two days. This is possible thanks to semi-permanent varnishes. These are varnishes that dry under a UV or LED lamp to be solid in the long term. But how to properly perform a pose like a professional? Today, the nail supply…
 How is a gel manicure? The gel manicure is performed (with a few details) in the same way as a traditional manicure. First, the nails are cleaned and then lightly polished and the cuticles are pushed back. Then a protective base is applied, followed by drying under the UV lamp. THEN WE ATTACK SERIOUS THINGS WITH THE FIRST COAT OF GEL VARNISH, WHICH WILL ALSO…